Deterministic Zelnode and Zelflux Install Guide⚓︎
This guide will be using the install script on Vultr's VPS platform⚓︎
Note
Note: All test runs of this install script have only been done on VPS platforms and most likely will not work on personal home servers. USE AT OWN RISK.
Requirements
- Collateral (10K Basic/ 25K Super/ 100K BAMF) Exchange List
- Control wallet and will recommend to use Zelcore
- SSH client such as MobaXterm or Putty
- VPS that meets the required specs for the tier
| Tier  | vCore | Ram   | SSD    | Bandwidth         |
|-------|-------|-------|--------|-------------------|
| BAMF  | 8     | 32 GB | 600 GB | 6 TB @ 100 mbps   |
| SUPER | 4     | 8 GB  | 150 GB | 4 TB @ 100 mbps   |
| BASIC | 2     | 4 GB  | 50 GB  | 2.5 TB @ 100 mbps |
Setting up Control Wallet⚓︎
Zel Full Node on ZelCore
-
Login to your Zelcore account and set automatic log out to never.

-
Select
Zelfrom your portfolio, click on the3 dotsin top right corner to see options, and startfull node.

-
If you don't have a Sapling address create one first and backup your private keys. To create a Sapling address click on
Receiveand thenNew Sapling Address. Now click onTools, Wallet Management, then Import/Export. Click to choose path on Export option and export to a location of your choice. Save this offline somewhere safe. Also backup thewallet.datfile which you could find in yourappdata roaming folder(Windows), library app folder(Mac), or .zelcash(Linux).


-
Click on
Receiving Addressand copy one of your transparent address you want to send your collateral to. Send the exact amount of Zel for your Zelnode collateral to the transparent address you just copied all in one transaction no more no less. Keep in mind with this upgrade to deterministic Zelnodes you now how to wait100 confirmations(3.5 hours)before starting your Zelnode. So before moving on to the next step go do something and kill some time.
Setting up VPS⚓︎
ZelNode and Flux setup
-
Now time to setup the Zelnode on the VPS. Whether you use Vultr, Digital Ocean, or Hetzner make sure you select the right server with the hardware specs you need for the Zelnode you are trying to setup. You will fail to get the Zelnode on the network if you try on a server that doesn't meet the requirements. Following images are from Vultr and for a Basic Zelnode.
Deploy new serverSelect a locationChoose Ubuntu 18.04 as your OS(recommended)Name your server and deploy


-
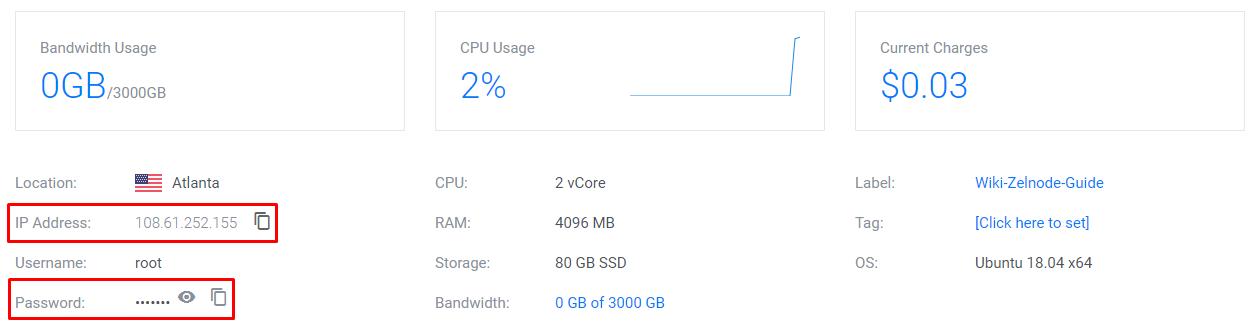
To access your server open up your SSH client and add your IP address. Will be using MobaXterm for this guide.
Click SessionSSH as your session typeYour VPS IP address in Remote Host and give it a name under Bookmark Settings


-
Login as root, copy password you got from your VPS provider, and right click to paste. You won't see password being typed out but it's there so hit enter after pasting. Create a user, add user to the sudo group, install docker from their apt repo, add user to the docker group, and reboot. List of commands to do all this.
Change USERNAME to name of your choice and replace USERNAME with one you chose in following commands
adduser USERNAMEadduser USERNAME sudoapt-get update && apt-get install apt-transport-https ca-certificates curl gnupg-agent software-properties-common -y && curl -fsSL https://download.docker.com/linux/ubuntu/gpg | sudo apt-key add - && add-apt-repository "deb [arch=amd64] https://download.docker.com/linux/ubuntu $(lsb_release -cs) stable" && apt-get update && apt-get install docker-ce docker-ce-cli containerd.io -yadduser USERNAME dockerrebootYou will be prompted to add user info after you create a password. Just leave them blank and hit enter as it is not required.


Final Steps⚓︎
Configure and Run Install Script
-
Back to your full node on Zelcore. In the Zelnodes section which is in the bottom right select the
Zelnode Wizardto start your Zelnode configuration. You will be prompted to backup keys but since you did it earlier you could just select skip.Select the tierAdd your VPS IP address in front of the port(Ctrl+v to paste)Select the available outputGive the Zelnode an alias


-
Open up a text editor such as notepad and copy paste the
Zelnode private key, transaction id, and the output indexjust as I have it in image below. This will make it easier to just copy and paste when you run the install script as it will prompt you for this info during the install. Save and continue. Assuming you have waited100 confirmssince making the collateral transaction clickActivate my Zelnodeif not click on the X and you could start it once you have the confirmations.

-
Back on your SSH client log back in to your VPS but this time as the
useryou created.Do not login as root. Once logged in run the following command to start the installation script.bash -i <(curl -s https://raw.githubusercontent.com/dk808/deterministic-zelnode-script/master/install.sh) -
Script will prompt you the list below.
Confirmation of SSH port you're using select yes unless you changed itConfirmation of IP address of VPS script detectedTo add swap space if none is detectedZelnode Private Key (this is first value you copied to the text editor)Zelnode Collateral TxID (second value on text editor)Collateral TxID output index (last value on the text editor)Ask if you want to bootstrap Mongodb db for zelcash and I highly recommend you select YesYour ZelID (You could find this under Apps in your Zelcore wallet)Your CruxID (Create one in the Apps section of your Zelcore wallet)
Your ZelID is not your username but the set of values under the QR code as shown in the clip below.

Note
If you selected to bootstrap Mongodb it could take awhile during the loop that refreshes every 30 sec. as not only are you waiting for chain to sync but also Mongodb to sync. When refresh loop first starts do not worry if you don't see a block number next to "Mongodb on block" as it takes a few min for Zelflux to start up in the background. Loop will stop on it's own once it's synced.


At the end of the install it will give some tips on a few commands and the IPaddress:port for you to enter as your url on Chrome to access Flux. Once the refresh loop ends at end of script start your Zelnode from Zelcore/Zelmate if you haven't already. Wait about 5-10 min and enter zelcash-cli getzelnodestatus to check status of your Zelnode. Any further support please join Zel's Discord.

Tip
Highly recommend setting up SSH Key login and disabling password login for your VPS.
Any donations are welcomed and appreciated. Thanks.
dk808@zel.crux
18i3ba5wkG8XoYT3y8JP58yWwvMgEkHNHK
t1RaebuW5iav8QBVwuZ7WCx5SCaYm2WH2Sk
0x9ec5f94f680da4f0be8b6492020c84d60f99b5b7
LSvzrnPmpvNb4M9D9GHgMA3HA8ixQjigsT